DIY Map
As previously mentioned in my DIY list here, I am currently browsing through invitation card designs online, some of them being incredibly talented Etsy users who sell templates customised to our fancy and needs. This was originally thought and done by StripShidah, who did the same and then printed her cards at a local printing shop for as low as 40 cents per piece. I thought, what a genius plan to have a hand in your own invitation card process and save moolahs at the same time! I sukaaaa. And plus, it gives me an opportunity to customise my own envelopes which I have big, big plans for, but let’s keep that to another post shall we 🙂
I’ve pretty much decided which card design I want, but before sending the layout and content of the card to the seller, I realised that I still needed to craft a map of that included directions to Gurame, to be attached to the card. Takkan nak print screen dari Google Map kan (which I initially planned to but received disapproving looks from my mom) so I decided to make it more aesthetically appealing and user-friendly for my guests.
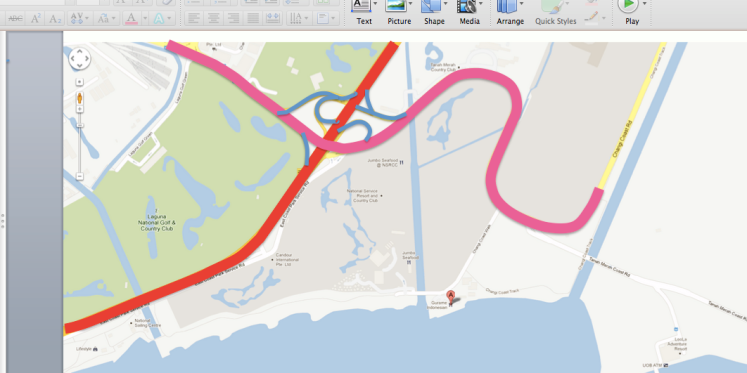
Using the print screen of the Google Map of the vicinity around my wedding venue, I pasted it onto a Powerpoint doc (because I can’t use Photoshop for nuts).
I used the drawing tool to trace and outline the major and minor roads leading to the venue, like so:
I started off with the expressway because it was straightforward, and pleasantly, it wasn’t as hard as I thought it would be. The tool is very simple to use, even for drawing curves. To make the road appear thicker, I increased the weight of the line to 10 pts.
I continued to trace the other roads and colour-coded them in order to show how they were individually drawn, like below:
Personally, the minor roads leading out from the expressway were the hardest to trace but the trick is just to zoom in closer into the map and trace slowly. Got the hang of it after a while! Once I was done outlining all the roads I wanted, I standardised the colour so that it looked like this:
To give the end of the road near Gurame a “finished” look, I changed the end of the line from “flat”…
… to “round”:
After that, I was just left with simple tasks like annotating the roads and labelling nearby landmarks. Once I was done customising the map to my desired colour palette, I deleted the original Google Map in the background and VOILA. Here’s the finished map!!
I still don’t quite believe I managed to pull it off actually, but hey, the drive to create a map that matches the rest of the wedding invitation really motivated me to finish it. Call me sanggup or whatever, but these details matter, and I’m quite sure there are other brides out there who also share my sentiments 🙂


waaaah.. thanks for the tips! very useful! 🙂
no problem! mana lah tau you need this skill one day kan hehhhh
Wah!!! Not bad eh!! Looks like those maps we see in the wedding invites!!
might be one of the ways they do it!! but of course they’d have all those fancy applications like photoshop lah to make the image look nicer…
This is useful! Even though I probably have no patience to do this. =x
Mak cakap nak kahwin nak kena banyak sabar. Hehhhhhh
i did this too babe! and gave it to my card designer and she was like ‘wah you did my job already!’ haha. but i guess directions is important lah kan. nanti orang sesat, our parents yang kena bear their brunts! heh. nway, good job on yours! it looks superb. 🙂
sajak lah kita orang yang terlalu rajin. HAHA!
You. Are. A. Genius. *mulut ternganga sebab terpegun*
lalat masuk mulut nanti! hahahaa
Steady lah babe! Mula-mula i was like..apa aja minah ni nak bikin tau..jadi ke? Skali end product fuhhh! 🙂
you tak caya i ehhhh. sampai hati. nyehehehe.
for someone who is always drawing maps on photoshop & illustrator, i’m impressed with your made-from-powerpoint-map.
kalau u cakap u buat pakai photoshop pun percaya.
but i think i’m better with photoshop than powerpoint so this would have been an immediate fail for me. hehe
alhamdulillah!!! straight from the mouth of le master of wedding cards herself weeeee. photoshop is way too advanced for me lah kak dyan!